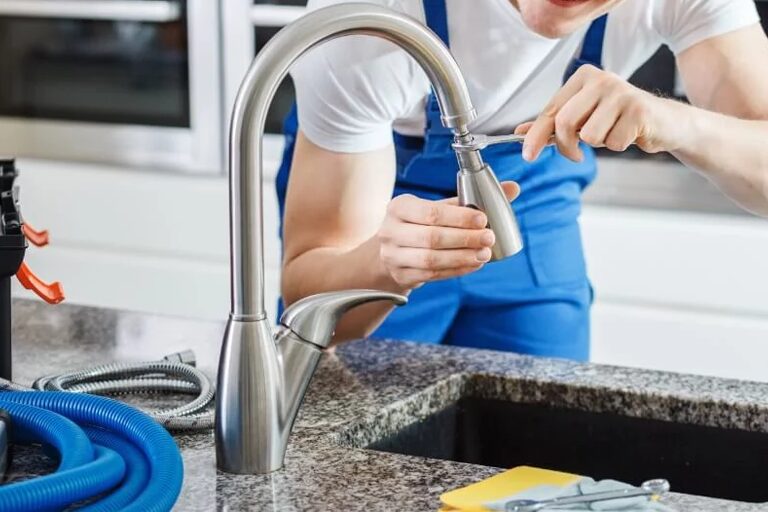
Kitchen Faucet Services: 6 Upgrades That Improve Function & Style
Kitchen faucet upgrades improve function and style at the same time. Many homeowners explore these changes after dealing with leaks, weak pressure or worn finishes. For deeper insight into early plumbing issues, guides such as 9 Causes of Dripping Faucets and How to Stop Them help explain warning signs before upgrading. This breakdown highlights six faucet upgrades that strengthen workflow, improve cleanliness and support a modern kitchen design. Each option fits both small and large kitchens, and every upgrade brings a direct benefit to daily tasks.
Touchless Faucets
Touchless faucets improve hygiene and speed during cooking. Hands-free sensors prevent the spread of residue across the sink area, which keeps surfaces cleaner. In addition, automatic shutoff features support water control because the flow stops when hands move away. This upgrade also helps users who struggle with traditional handles, especially during busy meal prep. For instance, families with kids benefit from easier activation and fewer messes.
Key Benefits
- Hands-Free Use: Cleaner operation with less contact.
- Water Control: Sensors reduce waste through auto shutoff.
- Better Hygiene: Less spread of food residue.
- User-Friendly: Smooth for all age groups.
Pull-Down and Pull-Out Sprayers
Pull-down and pull-out sprayers improve reach and flexibility around the sink. These designs help rinse produce, flush debris and clean cookware with stronger precision. Also, extended hose movement makes it easier to fill large pots without lifting them into the basin. For instance, homeowners with deep sinks notice better control because the sprayer positions water exactly where needed. In addition, these sprayers work well in compact kitchens where every bit of movement matters.
Key Benefits
- Extended Reach: Covers all sink corners.
- Better Rinsing: Strong aim for produce and cookware.
- Heavy Pot Help: Easier filling from inside the sink.
- Tight-Space Fit: Smooth function in small layouts.
Pot Fillers
Pot fillers add direct water access near the cooktop, which reduces the effort of carrying heavy containers across the kitchen. This upgrade becomes useful in homes where boiling, simmering or batch cooking happens often. Also, fewer trips between the sink and stove lower the risk of spills. For instance, families who prepare large meals notice easier workflow and less strain. In addition, pot fillers improve safety because users avoid lifting oversized pots filled with water.
Key Benefits
- Back Relief: No need to lift heavy pots.
- Fewer Spills: Water goes directly into the cookware.
- Faster Prep: Shorter movement during cooking.
- Cooktop Convenience: Ideal for frequent boiling.
Specialty Finishes
Specialty finishes improve the faucet’s appearance and help match the kitchen design. Options such as matte black, brushed nickel, brass and oil-rubbed bronze offer stronger style control than standard chrome. Also, these finishes resist fingerprints and water spots, which keeps the sink area cleaner through the day. For instance, matte black supports modern layouts, while brushed nickel blends smoothly with neutral interiors. In addition, finish upgrades often appear during plumbing evaluations, and guides like 8 Plumbing System Warnings help identify deeper system issues that may need attention during updates.
Key Benefits
- Better Style: Matches modern or traditional layouts.
- Clean Look: Resists spots and smudges.
- Strong Variety: Multiple colors and tones.
- Design Balance: Fits current kitchen materials.
Wall-Mounted Faucets
Wall-mounted faucets give the sink area more open counter space and a clean visual line. These designs shift the faucet upward, which makes wiping the counter easier and reduces clutter. Also, many homeowners choose wall-mounted faucets for a high-end look without replacing the entire sink. For instance, this setup works well in kitchens with limited workspace because the faucet no longer sits on the countertop. In addition, installation may require extra plumbing access, yet the long-term benefits often outweigh the effort.
Key Benefits
- More Space: Frees the counter surface.
- Easy Cleaning: Fewer areas for residue buildup.
- High-End Look: Strong design upgrade.
- Better Alignment: Centered water flow over sink.
When to Consider a Faucet Upgrade
Certain signs show that a faucet upgrade is the better option than continued repair. Low pressure, ongoing drips, worn finishes and leaks around the base all point toward system fatigue. Also, frequent repairs often cost more than installing a new faucet that performs better and uses water more efficiently. For instance, inconsistent temperature control signals internal cartridge issues that usually return over time. In addition, homeowners who notice slow drainage or moisture around fixtures may need broader plumbing evaluation.
Upgrade Indicators
- Low Pressure: Flow problems not solved by cleaning.
- Ongoing Drips: Repairs fail to stop leaking.
- Surface Wear: Corrosion or peeling finish.
- Base Leaks: Water pooling near faucet base.
Wrap Up
Kitchen faucet upgrades improve daily workflow, water control and overall kitchen style. In addition, touchless models support cleaner cooking by reducing contact on messy hands. Meanwhile, pull-down sprayers improve reach and make rinsing tasks faster. Furthermore, pot fillers reduce strain by removing the need to carry heavy containers across the kitchen. At the same time, specialty finishes refine the look and build a cleaner visual line across the sink area. On the other hand, wall-mounted options free counter space and keep the base area organized. Finally, handle styles fine-tune comfort by shaping how easily the faucet responds during meal prep.
Frequently Asked Questions
Touchless sensors, pull-down sprayers, pot fillers, specialty finishes, wall-mounted designs and handle style upgrades improve both function and workflow.
Touchless faucets reduce waste because sensors shut off the flow immediately when hands move away.
Pull-down sprayers offer strong reach and help rinse corners easily, which supports tight layouts with limited sink space.
Pot fillers help when large pots, heavy cookware or frequent boiling tasks are part of daily cooking.
Specialty finishes hold up well because many resist fingerprints and water spots, which keeps the faucet cleaner through the day.
Wall-mounted faucets free counter space, improve sink access and create a cleaner visual line across the kitchen.
Single-handle setups adjust temperature quickly and work well for busy kitchens that need steady control.
An upgrade becomes the better choice when leaks return, finishes wear out, pressure stays low or repairs fail to solve the issue.